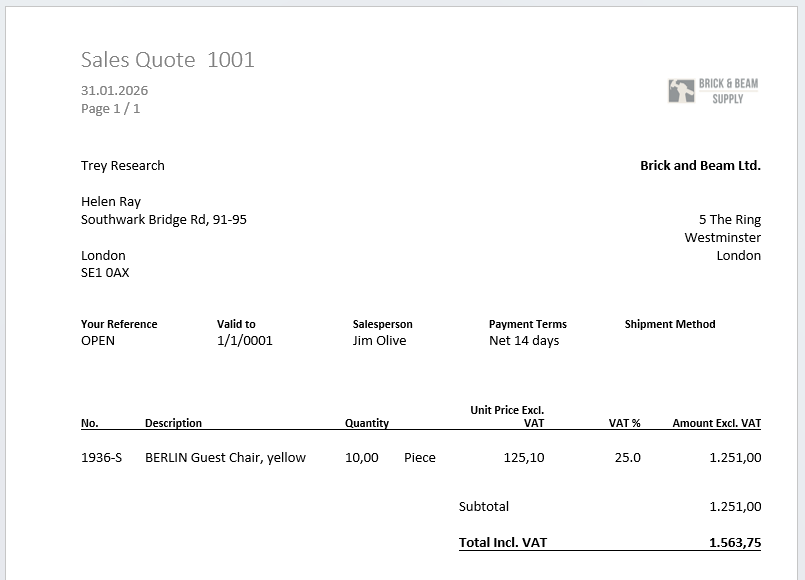
This article explains how to create a sales quote template using the DocumentsCorePack Layout Designer for Business Central. In this step-by-step guide, you will learn how to create a sales quote template that includes item numbers, quote descriptions, and discount information.
Step 1: Set the base table
Before you start designing your template, the first step is to define the base table, as this determines which fields are available in the Layout Designer. Please note that once a field is added, the base table cannot be changed.
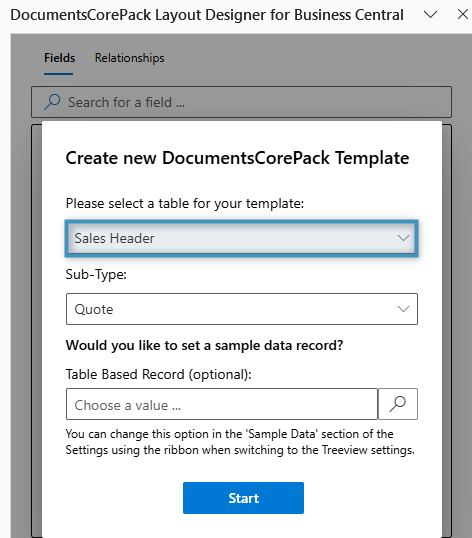
For this walkthrough, click on the Insert Fields button located in the Fields group under the DocumentsCorePack BC tab. Once the Layout Designer opens, select Sales Header as the base table. The Sub-Type will automatically be set to Quote, ensuring that only quote-related fields are available.
Step 2: Adding our standard fields
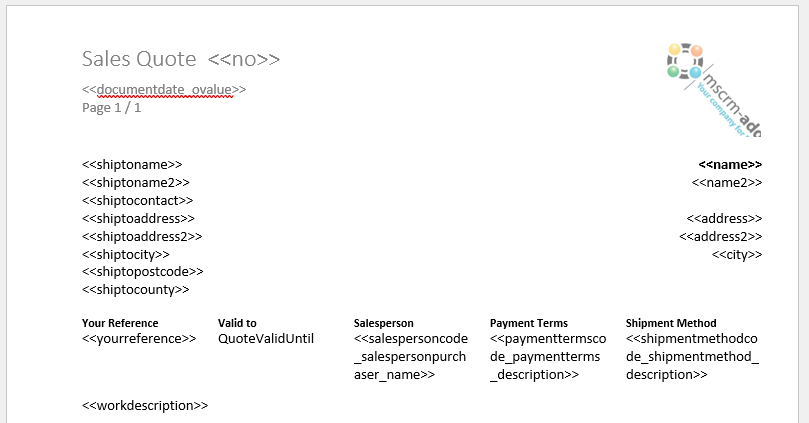
We will start by setting up the overall structure of our sales quote template using standard fields. The template below illustrates the template layout.
Step 3: Creating our line items table
In this step, we will add a table to display the line items of our sales quote. This table should dynamically list all quote lines, including fields such as No., Description, Quantity, Unit Price Excl. VAT % among others. To achieve this, we will use the Sales Line entity as the foundation.
We first need to establish a relationship between the Sales Header and Sales Line entities. This allows the template to retrieve all associated quote lines for a given document. We will begin by opening the Relationship Designer and locating the Sales Header -> Sales Line (documentno) relationship, as shown below.
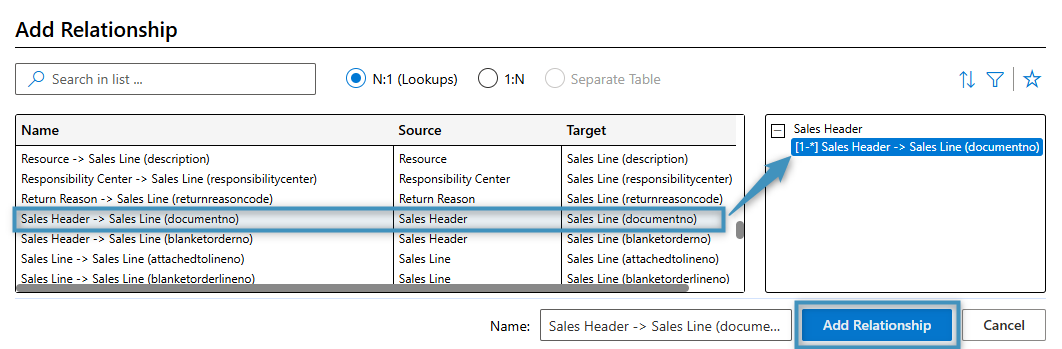
After saving the relationship, the Layout Designer loads the corresponding fields. The field list will look similar to this:
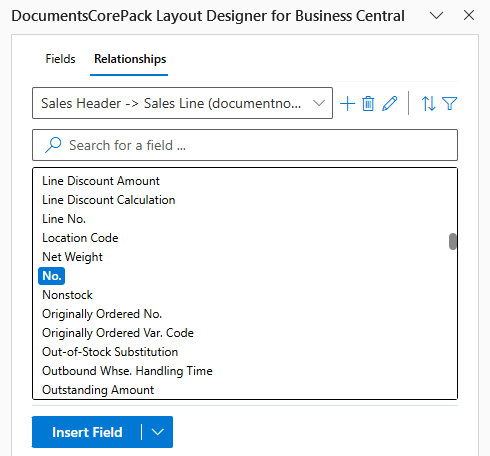
To create the table, double-click on a field you want to add. In our case, we will add the No. field. This will open the Layout Designer, where we will structure the table as follows:
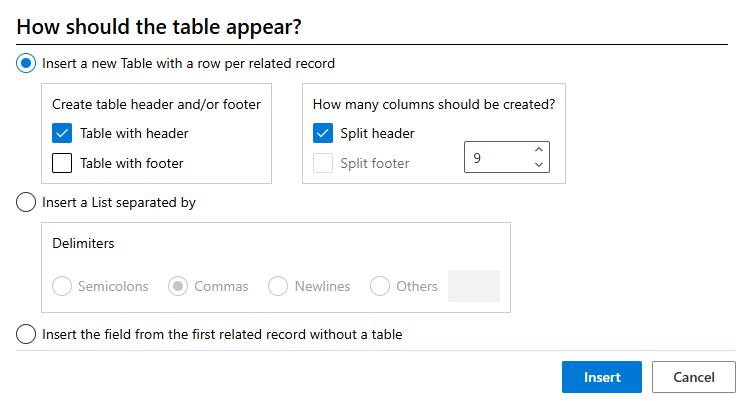
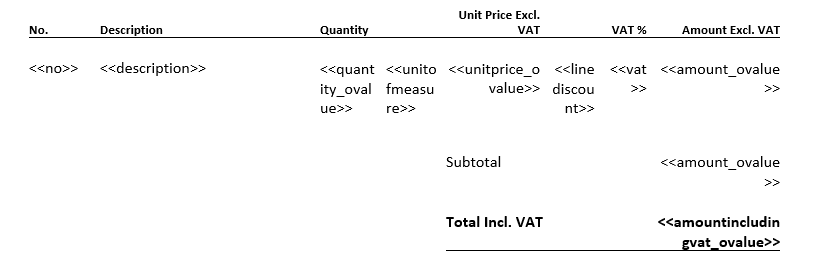
Next, we will insert the required fields into the table and name each column accordingly. We will also add the Subtotal field into a separate table beneath the main table, along with the Total Incl. VAT field. The final layout should resemble the example shown below:
Step 4: Generating the document
At this point, the template should resemble the following layout.
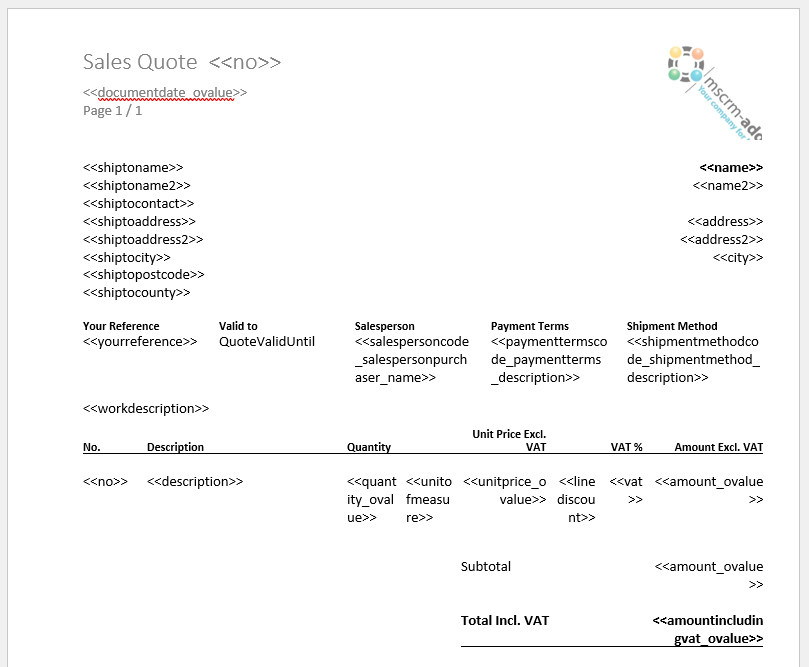
Merging this template with a Sales Quote record in Business Central produces the following result.