This article provides a step-by-step guide on how to create a manually triggered Power Automate flow for Business Central that generates an event document for a customer using the DocumentsCorePack (DCP) Connector for Business Central.
In this example, our goal is to generate an event document for a customer and deliver it by email. The email will include the event details in the attachment. To achieve this, we will create an on-demand flow that, once triggered, generates the document with the DCP Connector and sends it to the customer by email.
Step 1: Creating the flow by choosing a trigger
Start by visiting make.powerautomate.com, navigate to My flows, and then select New flow to create a new flow.
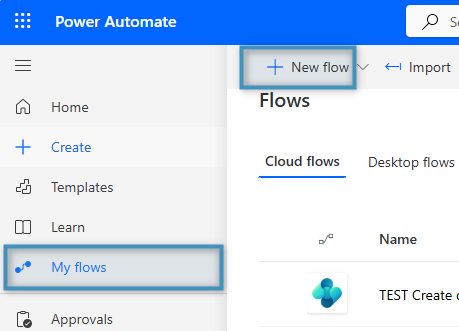
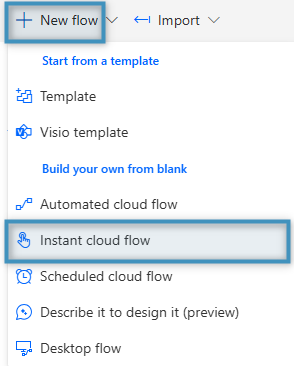
Form the New flow dropdown, select Instant cloud flow.
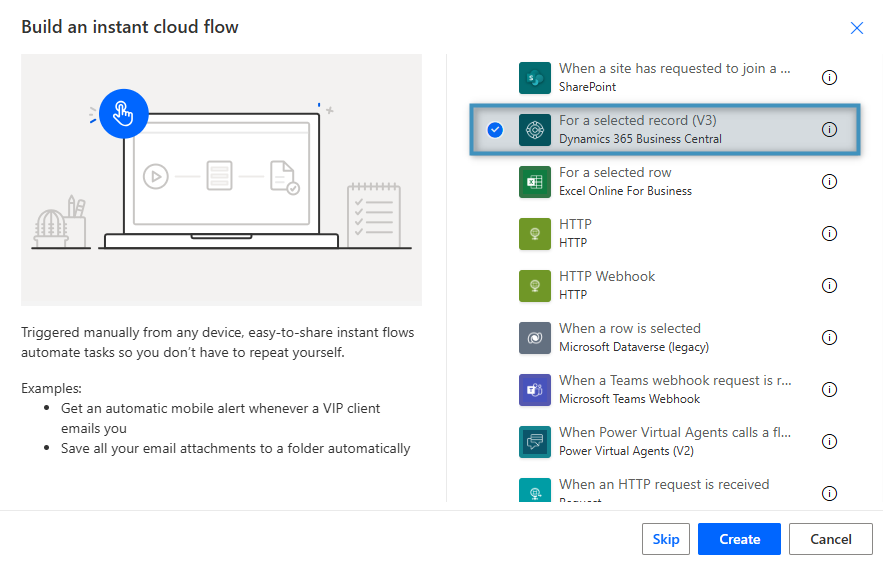
In this example, we are going to select For a selected record (Business Central) as the trigger.
Step 2: Configuring the flow parameters
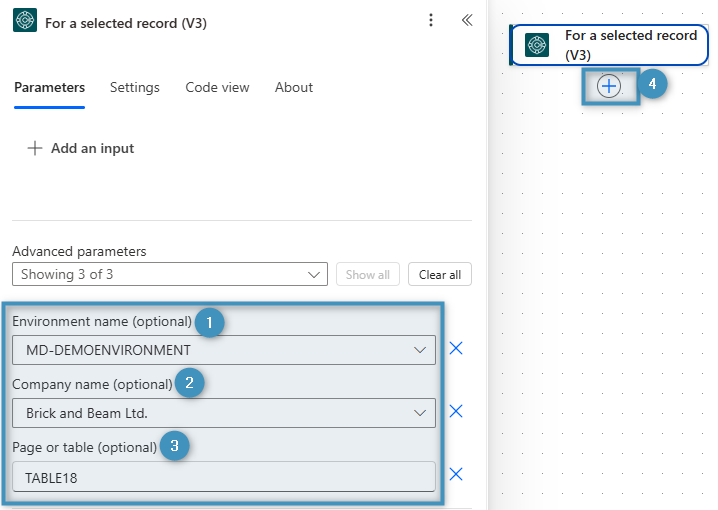
Fill in the flow parameters, including the ❶ Environment name, ❷ Company name, and ❸Page or table. Since we are working on a Customer table, our table number is 18.
Then, click on the ❹ (+) on the right and add a new action.
Step 3: Adding the “Create document” action from the DCP for Business Central connector
Search for the DCP for Business Central connector and select the Create document action from the list of available actions.
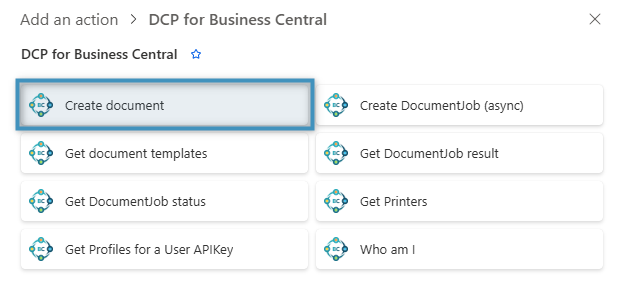
Step 4: Filling out the fields
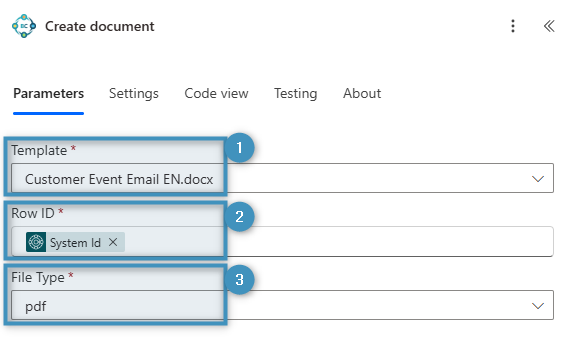
Selecting the action opens the window shown below. We will use this action to generate an event document. Configure the following parameters:
❶ Template: Select the template that should be used to generate the event document.
❷ Row ID: Select System Id from the dynamic content. The System Id uniquely identifies the Business Central record and ensures that the document is generated for the correct customer.
❸ File Type: Select the output format for the generated document. In this example, the event document is a PDF file.
Step 5: Adding the “Send an email” action
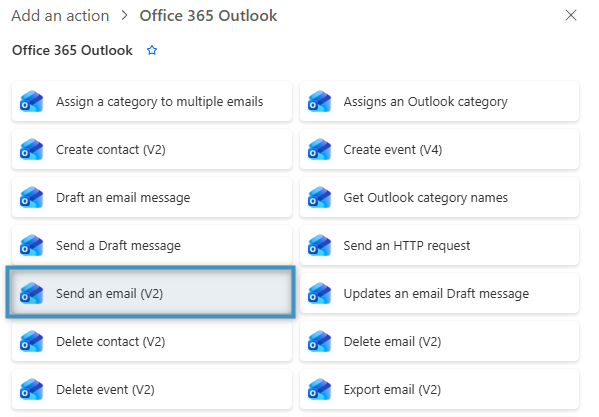
To add the email content, click on the (+) icon and search for the Office 365 Outlook connector. Then select the Send an email action.
Step 6: Filling out the fields
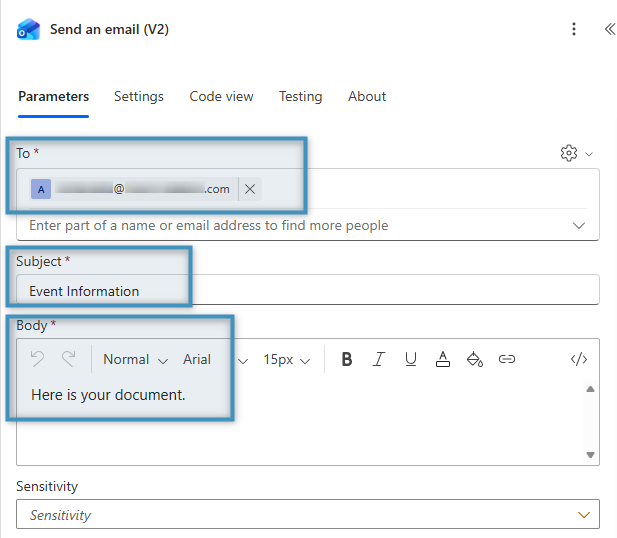
In the Send an email action, fill in the To, Subject, and Body fields as shown below. This information is used when the flow sends the email.
Note: You can enter static values or use dynamic content from previous steps, depending on your requirements.
At the bottom of the window, under the Advanced parameters dropdown, select the Attachments checkbox. Enter a document name in the Name field and use the dynamic body/Document content value in the Content field. The document will be included as an attachment when the email is sent.
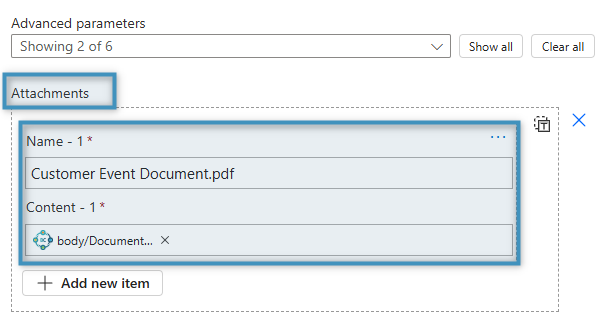
Step 7: Naming and saving your flow
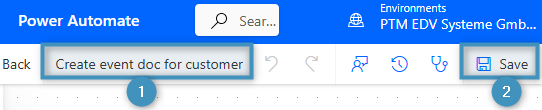
Enter a ❶ name for your flow. Use a meaningful name that reflects the flow’s purpose. Then click ❷ Save to store the flow and make it available for testing and future edits.
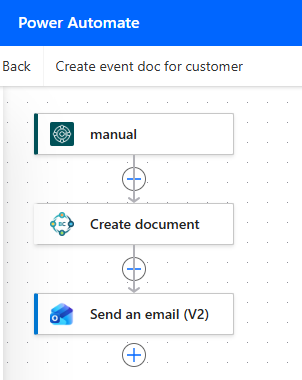
Below you can see what our completed flow looks like.
Step 8: Running the flow
After saving the flow, open a Customer record in Business Central. Click the (…) button in the upper-right corner, select Automate, and then choose your flow as shown below.
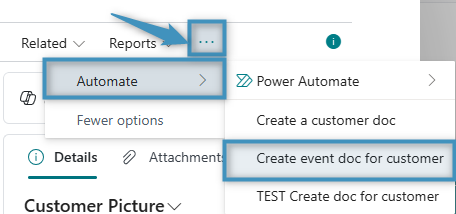
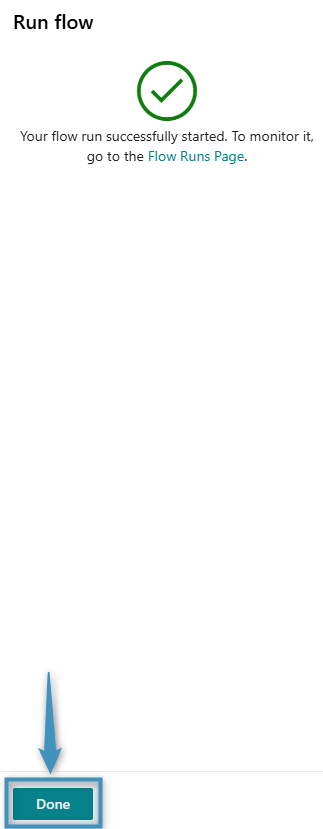
Proceed through the Run flow windows until the flow has been completed.
The Result
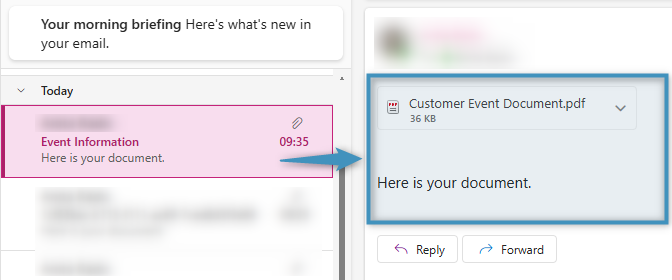
Below you can see the email that was received after running the flow. The email contains the generated document as a PDF attachment together with a brief message, confirming that the flow was completed successfully.
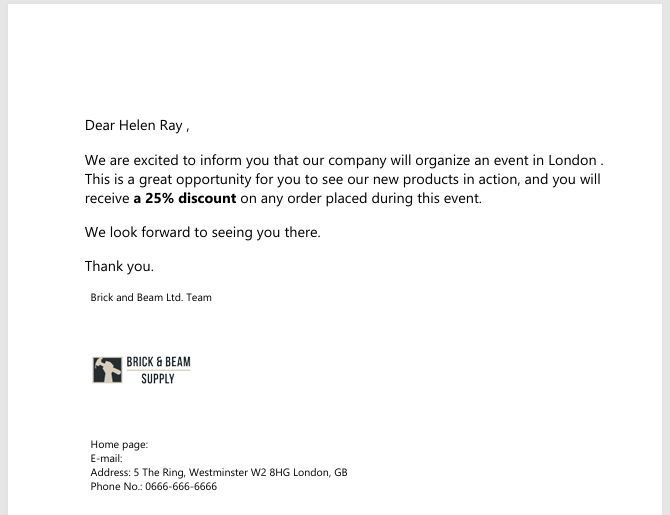
Our generated customer event document is shown below.
Alternative way to email a document
This flow follows the same setup as the standard manual flow, however, instead of using the standard email action, the generated document is passed to the Business Central Run action, which handles the email process through an alternative workflow. This approach provides greater flexibility and allows you to use a custom emailing solution while keeping the document creation process unchanged.
The example below shows the alternative flow for emailing a document.
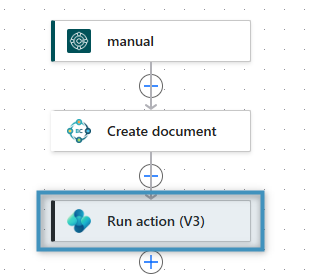
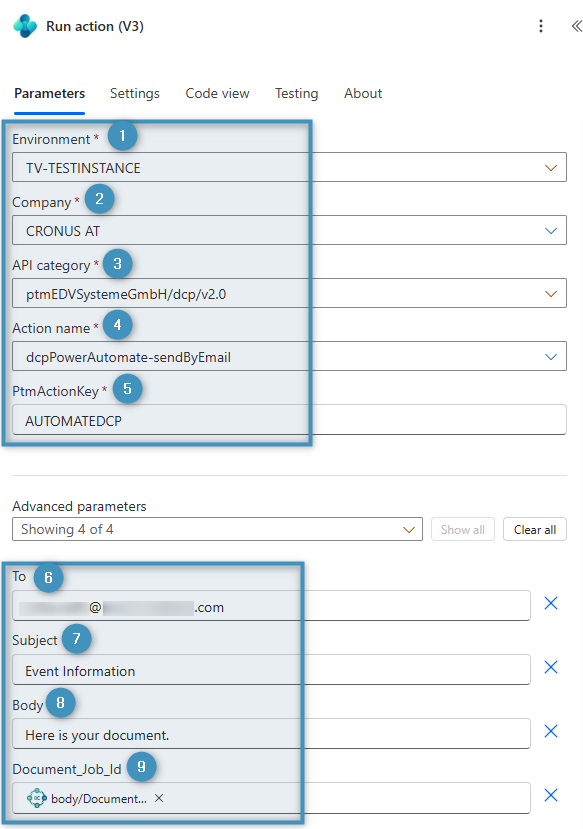
In the Run action, fill in all five required parameters (*), setting the ❶ environment and ❷ company parameters to correspond to your own environment and company. For the ❸ API category, set it to “ptmEDVSystemeGmbH/dcp/v2.0”. This will allow you to set the ❹ action name to “dcpPowerAutomate-sendByEmail”, which is required to send the email. Then, set the ❺ PtmActionKey to “AUTOMATEDCP”.
Under Advanced parameters, specify the ❻ To, ❼ Subject, ❽ Body and ❾ Document_Job_Id fields. For the Docuement_Job_Id, select the body/Document JobID dynamic value from the Create Document action. This ensures that the document generated in the previous steps is passed to the alternative email process.
After saving the flow, run it from a Business Central record. The document will be generated, passed to the alternative email process, and sent using the configured email settings.