Business Central provides standard print and mailing actions for handling documents. With DocumentsCorePack (DCP) for Business Central, these processes can be seamlessly extended to utilize DCP templates for advanced document generation and email handling, without changing the way users work in their daily routines.
This article explains four primary ways to integrate DCP into Business Central’s Print/Send tab, including overriding report layouts for printing, enhancing email functionality, attaching documents as PDFs, and improving the overall sending process.
Using DCP with “Print…”
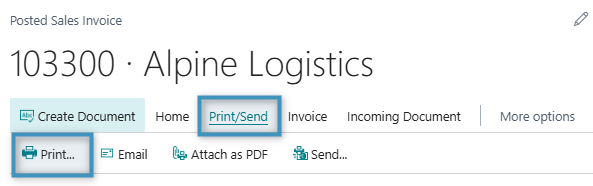
The first way we will integrate DCP into Business Central’s Print/Send tab is the Print… option. Our goal is to replace the default Business Central report with a DCP generated document. In our example, we will be using a Posted Sales Invoice and selecting Print… under Print/Send tab.
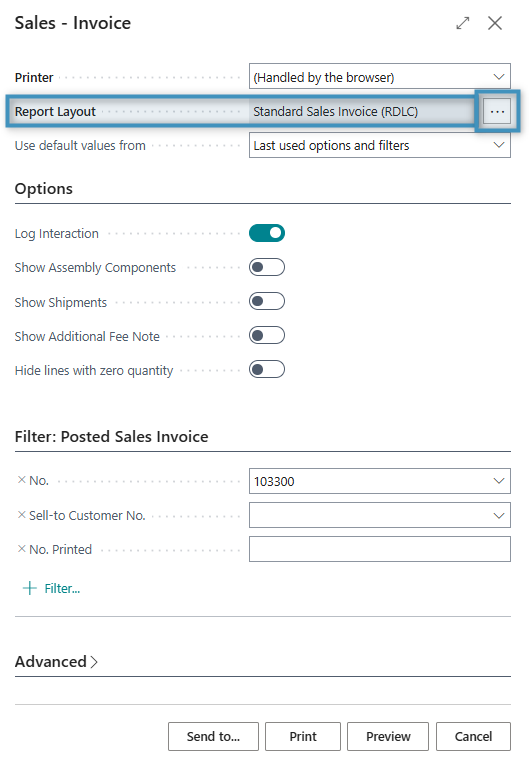
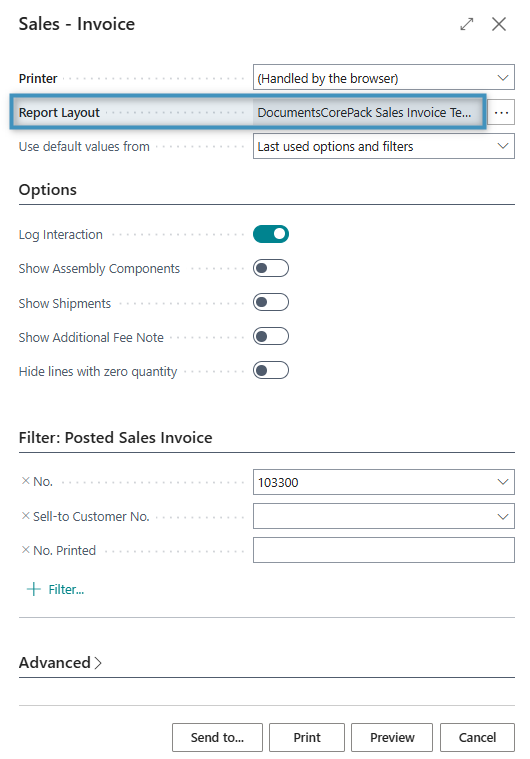
This opens the Sales – Invoice window. In the Report Layout field, with the default Business Central layout. Click the (…) button on the far right as shown below.
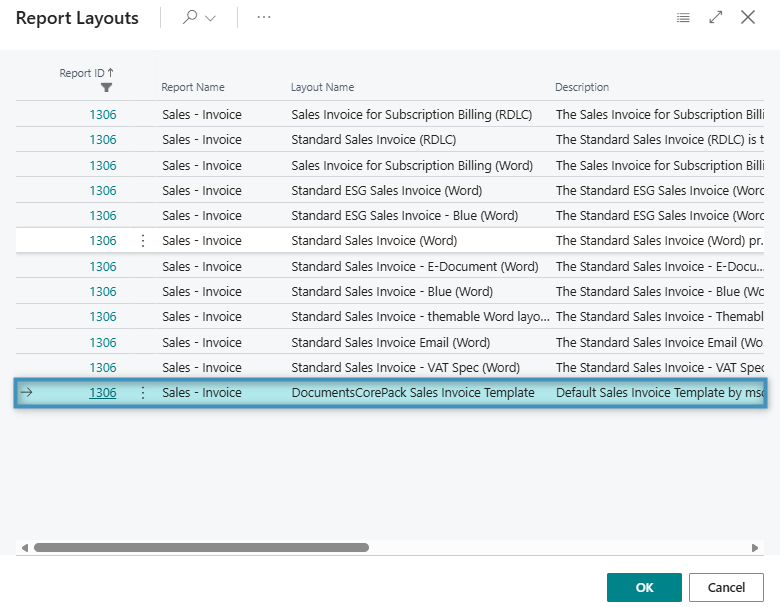
The Report Layouts page opens. Simply select a report from the list and click OK to change it. This allows you to choose a different layout for the report without setting it as the default layout.
Our selected report layout is now displayed in the Report Layout field. From here, you can choose how to output the document. Selecting Print will generate and print the document using the selected DCP template. Selecting Preview will allow you to review the document before printing.
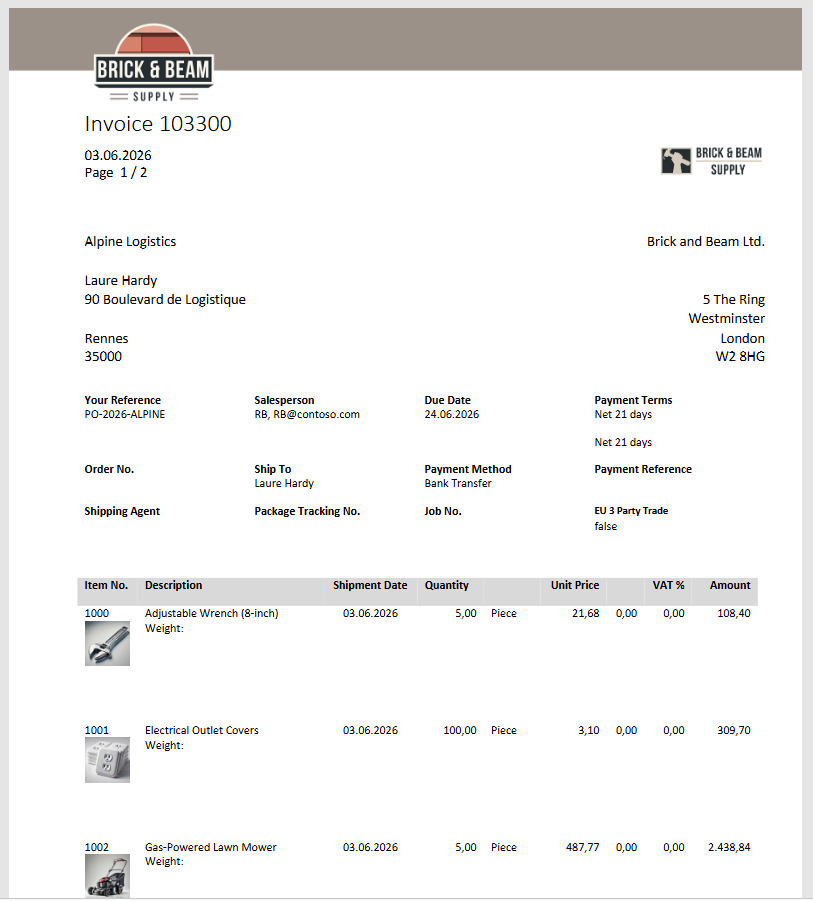
Below is an example of the document preview, as generated by the selected DCP template.
Setting the report as the default layout
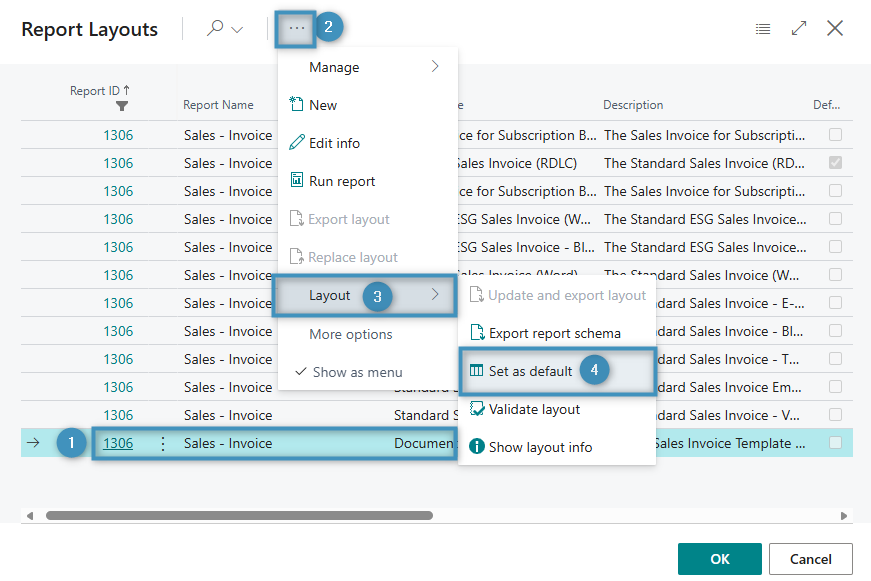
If you want to use a DCP report layout every time the report is generated, you can set it as the default layout. From the Report Layouts page, we will select our ❶ DocumentsCorePack Sales Invoice Template, then the ❷ (…) button at the top of the page. Under ❸ Layout, select ❹ Set as default, and confirm by clicking OK.
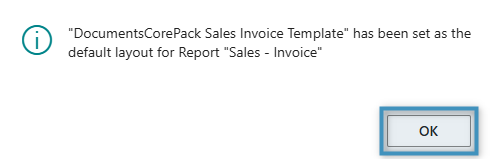
The following confirmation message appears, indicating that the DocumentsCorePack Sales Invoice Template has been successfully set as the default layout for the report.
Using DCP with “Email”
The second way to use DCP within Business Central’s Print/Send tab is Send by Email, which enables you to automatically generate both the email body and attachment using DCP templates.
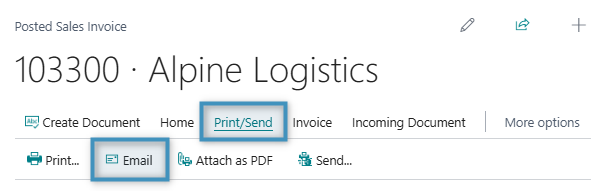
Start as in the previous section by clicking on the Print/Send tab, then select Email, as shown below.
Creating Email Messages
The Create Email Message functionality allows you to generate an email draft and automatically attach the document created by DocumentsCorePack.
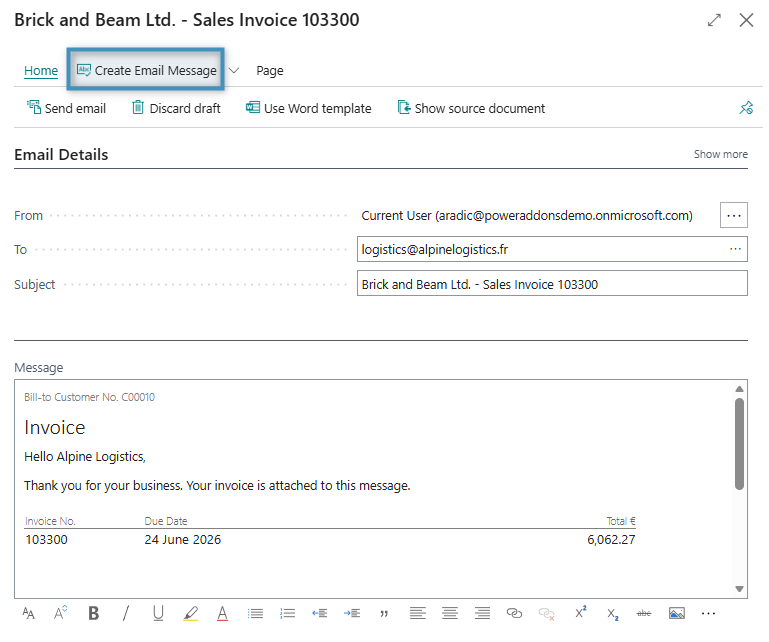
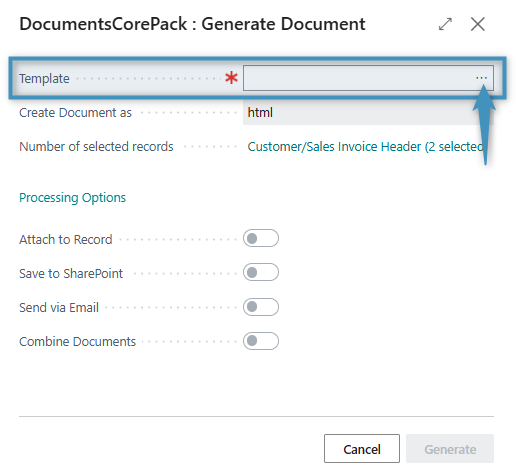
Clicking on the button will open the DocumentsCorePack: Generate Document window. In the Template field, we will select the email template to be used to generate the email content by clicking on the lookup button.
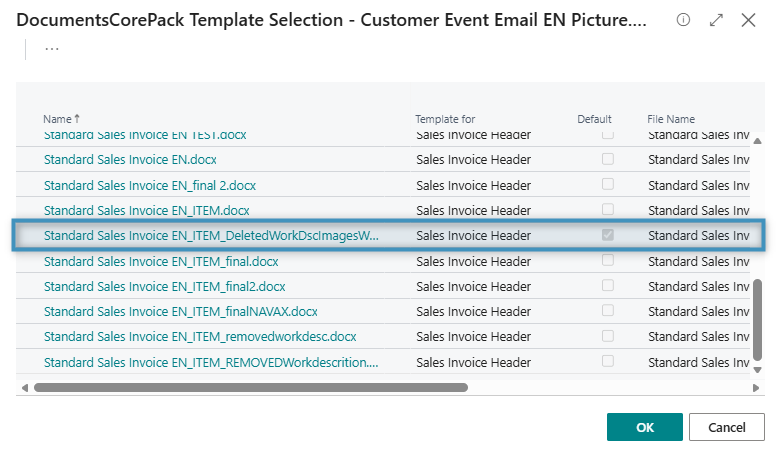
Select the desired email template from the DocumentsCorePack Template Selection window and click OK.
After selecting a template and confirming your choice, the template name is displayed in the Template field. Click Generate to create the email message using the selected template.
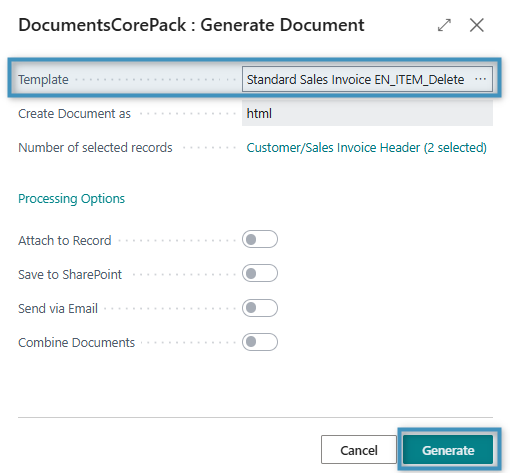
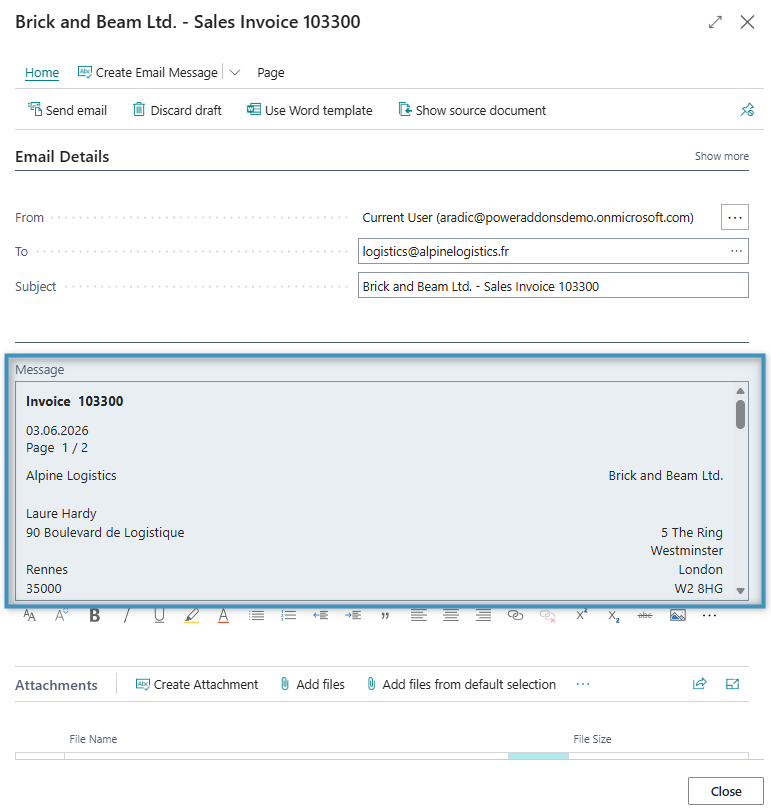
After the email template has been processed, the content generated from the selected template is inserted into the Message field, replacing any existing email content. Review the generated email and click Send email.
Sending Attachments
The Create Attachment button allows you to generate and add an attachment to your email.
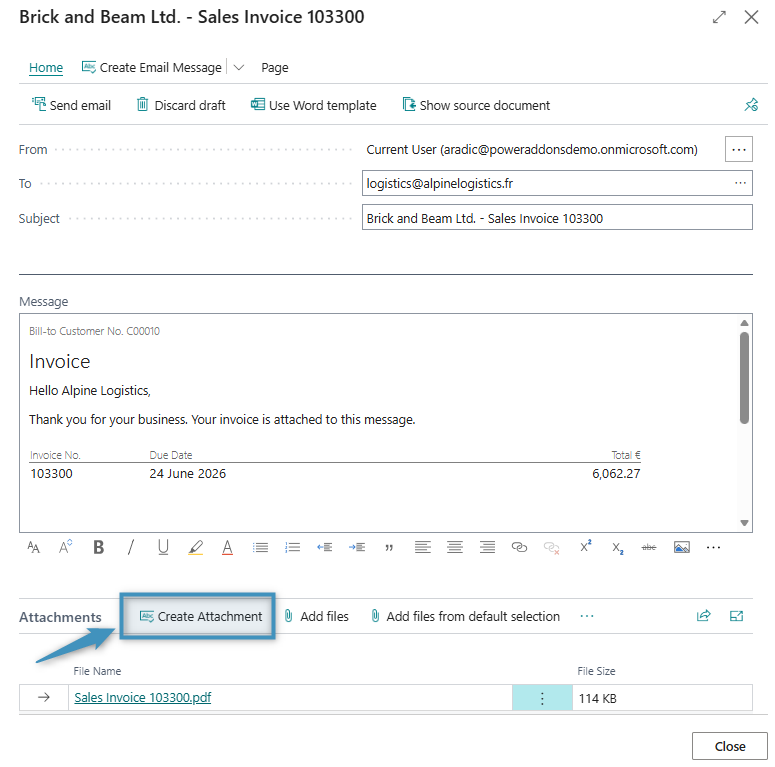
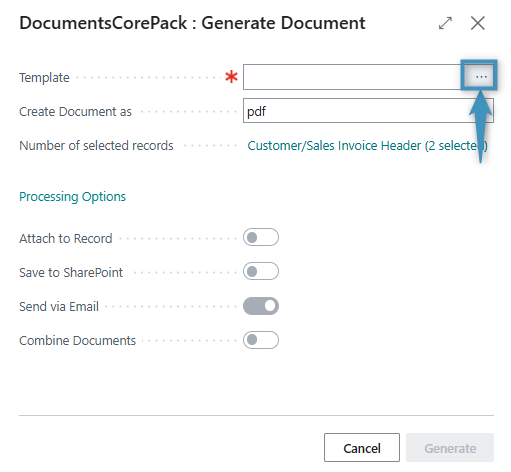
Clicking on the button will open the DCP Generate Document window. In the Template field, click on the (…) button on the right to select a template.
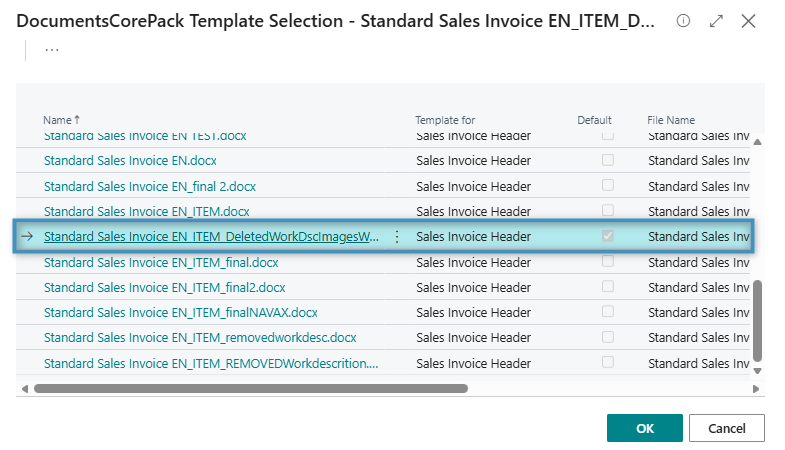
The DocumentsCorePack Template Selection window opens. From this list, we will select one of our DCP templates. Once selected, a document will be generated from the configured DCP template and automatically attached to the email as shown in the following figures. Click OK to confirm the selection.
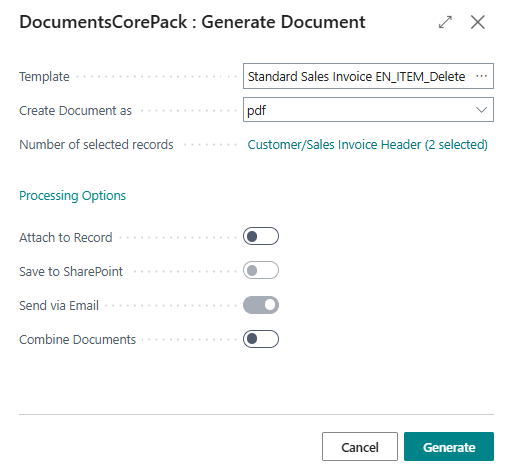
The DCP Generate Document window displays the selected template in the Template field. The Send via Email option is already enabled. Click Generate to create the document.
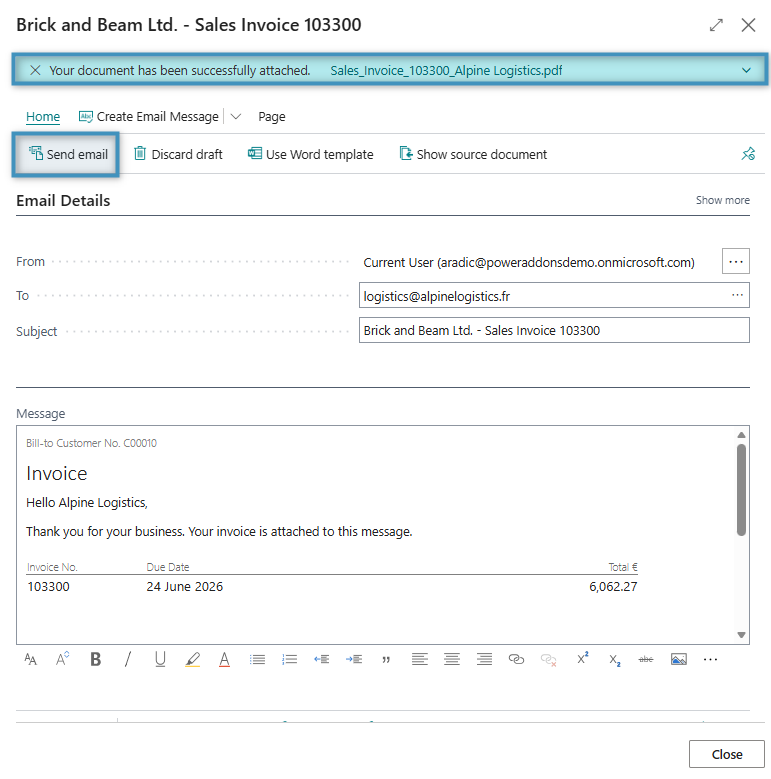
The email draft window opens with the generated document automatically attached, as confirmed by the notification at the top. The recipient, subject, and email body are prefilled based on the template. Review or adjust the email details as needed, and then click Send email to deliver the document.
Using DCP with “Attach as PDF”
The third way to use DCP within Business Central’s Print/Send workflow is the Attach as PDF option. This method allows users to generate and attach a document to the record in a single step.
As in the previous sections, start by clicking on the Print/Send tab, then select Attach as PDF, as shown below.
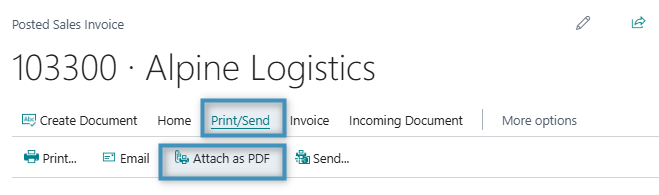
When using the Attach as PDF option, the system automatically creates the document based on the default report. If the DocumentsCorePack Sales Invoice Template report has been set as the default report, then the associated DCP template is used to generate the document.
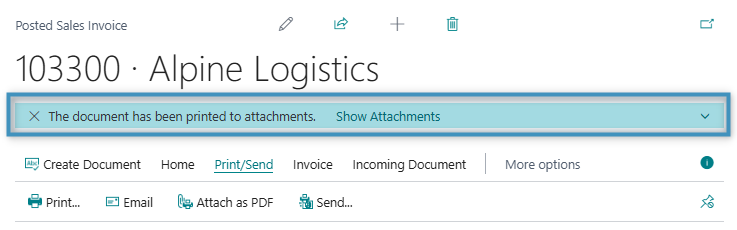
Once the process is complete, a notification message appears (see figure below) confirming that “the document has been printed to attachments.” The generated PDF is then directly attached to the record, without any additional user interaction.
Using DCP with “Send…”
The fourth way to use DCP within Business Central’s Print/Send workflow is the Send… option. The Send… option allows you to directly deliver a document (such as a sales invoice) to a recipient. This means the document is generated by DCP and then sentvia email.
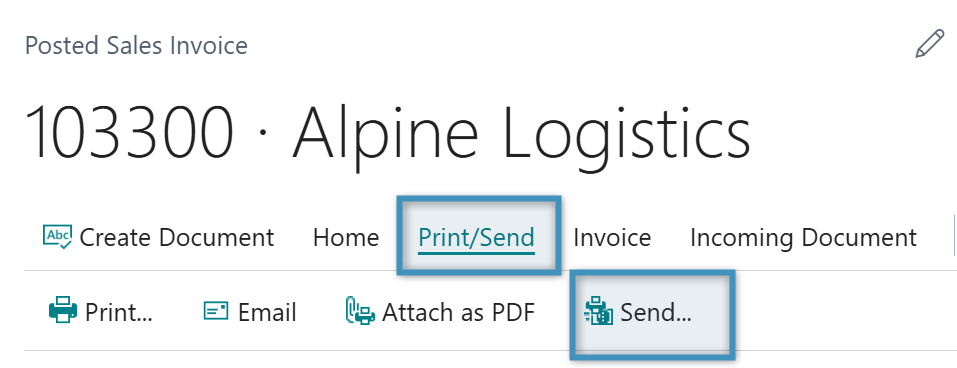
As in the previous sections, start by clicking on the Print/Send tab, then select Send…, as shown below.
The Send Document to window opens. This window allows you to control how the document will be distributed.
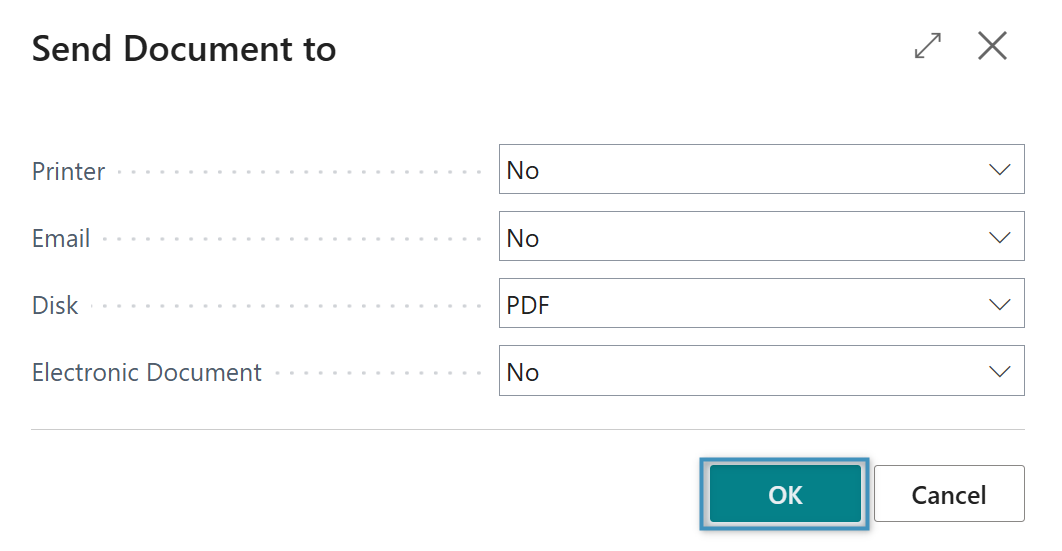
If the DocumentsCorePack Sales Invoice Template report has been set as the default report, then the associated DCP template is used to generate the document. Clicking OK will send the generated document based on your defined preferences.
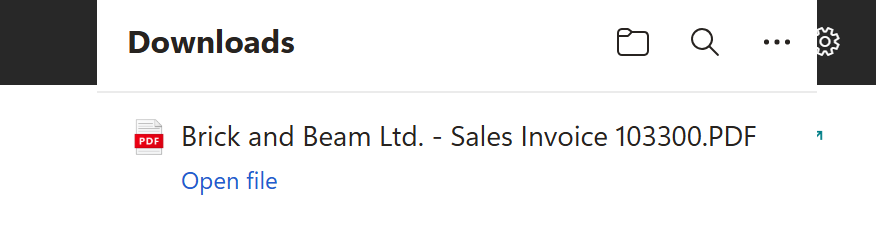
In the above example, the system generates the invoice and automatically downloads it as a PDF file to your device.